FREE GOLD LEAF! Order over £50 = 1 book, over £75 = 2 books, over £100 = 3 books.

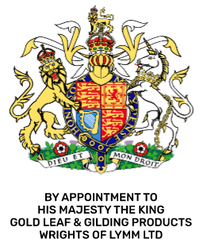
Frequently Asked Questions

CAN PRODUCT’S BE DELIVERED OUT SIDE OF THE UK ?

Yes, we do ship orders from outside the UK, unfortunately we are unable to ship any flammable products outside of the UK, this includes products such as the paints

WHAT IS THE DIFFERENCE BETWEEN LOOSE AND TRANSFER?

Loose leaf is leaf placed loosely between the sheets of the book. The leaf cannot be handled and is normally lifted directly from the book with a special brush, tip or tweezers (see tools) and then placed onto the surface. Transfer leaf is leaf placed on a sheet of wax or tissue paper within the book which is larger than the leaf, therefore each sheet can be removed individually. It can then be placed face down and with slight pressure the metal will be released onto the surface, rather like a child’s transfer. It is usually easier to use transfer leaf then loose

GENUINE GOLD LEAF OR IMITATION GOLD LEAF?

There is nothing that will shine and look as good as genuine gold leaf and will last for many years. The advantages to using imitation leaf, it is cheaper than real gold leaf, it is a little thicker and so is easier to handle

I NEED THE PRODUCTS URGENTLY , HOW SOON CAN YOU DELIVERY?

Providing goods are in stock and order is placed before 1pm (by telephone) or 12 (noon) by website, we can despatch same day for a next day delivery.

DO YOU SEND OUT SAMPLES?

Yes, you can purchase a sample booklet gold leaf, which comprises of 18 leaves.

WILL GOLD EVER GO DULL?

No gold will always retain its brilliance and lustre which will last for many years

HOW DO WE HANDLE THE GOLD AND SILVER?

Gold or Silver leaf cannot be handle, it will stick to the warmth of your hand, we supply brushes, tips and tweezers. please refer “What is the difference between loose or transfer” to ensure you use the best leaf for your requirements.

WHY USE GENUINE GOLD LEAF?

Gold’s beauty, lustre and non-tarnishing properties make it the preferred material for gilders and will last longer than any other materials/metals

BASIC TOOLS USED IN GILDING

1. GILDER'S CUSHION This is a piece of MDF approximately 9 inches by 6 inches. It is covered with thick blanket and the stretched over this is a soft calf skin leather, this is tacked into position to the four edges of the board. At one end and partly round two sides is a parchment or strong card windshield which is approximately 4 inches high, made to fold flat when not in use. The parchment/card sides when raised shelter the Gold Leaf whilst working, as the slightest draught will lift the Gold from the cushion and it is an almost impossible task to recover the leaf from the floor or anywhere else it may fall, due to the leaf being so thin. On the underside of the cushion is a leather loop for your thumb when holding the cushion. This enables the cushion to be held like a palette when in use. There is also a leather patch to hold a gilders knife. 2. GILDERS KNIFE This is a scale tang knife with either a stainless steel or a carbon steel square blade with a dark wooden handle. The blade is fairly flexible and not too sharp. This is used for cutting the leaves of Gold Leaf into smaller pieces when placed onto the Gilders Cushion. 3. GILDERS TIP Made in various widths and consisting of either squirrel hair, pony hair or badger hair, sandwiched between two pieces of thin cardboard. The hair of the tip is gently brushed against the side of you face to build up some static or grease to attract the gold leaf to the tip from the booklets or cushion prior to being placed on the surface to be gilded. 4. GILDERS MOP A domed mop brush made from squirrel hair or pony hair, this is used to gently brush over the Gold Leaf once applied to the surface you are gilding. This brushes the leaf into place and brushes away any excess leaf. 5. AGATE BURNISHERS Made from highly polished agate set in wooden handles, this is gently rubbed against the Gold Leaf to burnish to a high shine. These available in many shapes and sizes, the most popular being No.22 known as the dog tooth. 6. PARCHMENT CLIPPINGS/RABBIT SKIN GLUE Size made with Parchment Clippings is by far the best. This is prepared by boiling 110grams of clippings with 1 Litre of water. The clippings should be simmered with the pan nearly covered for 1 - 1 1/2 hours by which time the liquid will have been reduced to almost half its original amount. Whilst still hot, strain the liquid to remove the remaining clippings. Once the size has cooled it should be the consistency of jelly. If you prefer to use Rabbit Skin Glue then you will need to soak 45 grams of the granules in 750ml water overnight. Liquefy it by warming it in a saucepan, do not allow to boil. Rabbit Skin Glue is also used in the making of gesso when mixed with whiting and as the biding agent bole. 7. WHITING Whiting is used for applying to surfaces prior to gilding, to act as a resist, in order for surplus Gold Leaf to be easily removed. It is also used in the preparation of gesso and mixed with Rabbit Skin Glue. 8. GESSO A mixture of Rabbit Skin Glue and Whiting, this is to be warmed and then used as a surface coating prior to gilding or to repair damaged and brittle frames, mirrors and furniture. It can also be used as a glue to join broken pieces of old gesso or plaster and moulded to fill in missing parts. 9. BOLE Bole is a clay like substance that is used as a base for gilding. It is applied to a prepared surface. The bole enhances the tone and lustre of the Gold during the burnishing process. Bole is a natural product and is available in various different colours. Some boles are already pre-mixed and ready to use where as some need to be mixed with Rabbit Skin Glue until a single cream consistency is reached. 10. GOLD SIZE This is available in oil-based or water-based. Oil-based is recommended for exterior work and comes in 1, 3, 4 and 12 hour drying times. The water-based size is for interior use only and has a drying time of 15-30 minutes. Both are to be applied as thinly as possible and let to dry at their recommended drying times until which they will become tacky like the dry tack on a post it note. This is when it is ready to apply the Gold Leaf. Gilding Capsules are also used as a size when glass gilding, these are dissolved in water of a ration 4 capsules to 500ml water. 11. GOLD LEAF This is available in many different shades and carats from 24ct Pure Gold down to 6ct White Gold, the most popular being 23.5ct. Externally we recommend you use nothing lower than 23.5ct. Gold Leaf comes in booklets of 25 leaves, each leaf measuring 80mm x 80mm and is available in Loose form and Transfer form. Loose Leaf - Each leaf of Gold is lay between rouged pages in the booklet and a Gilders Tip is used to remove them. Transfer Leaf - Each leaf of Gold is adhered to a piece of acid free tissue paper and can be pressed to light, medium or hard press depending on the gilding work being done and how easily you require the leaf to come off the tissue paper.

GILDING ON STONE

When gilding externally on stone we would recommend that you use 23.5ct Gold Leaf or above, as anything lower in carat will tarnish due to the elements outside. When carving the lettering in stone, hand cut lettering will always look better than sandblasted lettering, this is because the V shape catches the light and reflects the Gold. If sandblast lettering, try not to blast too shallow as this will make the leaf look flat and will not last very long or too deeply as this can make the leaf look bronzed and will not reflect the light. Once the lettering is all ready it will need an undercoat either in the form of Transparent Sealer or a gloss enamel paint. This seals the stone prior to gilding so it is no longer porous and will not absorb the gold size. You may need more than one coat of undercoat and this will need to dry hard before applying the Gold Size. Once dry, it is now ready to apply the Gold Size, this will need to be an oil based Gold Size and many Gilders prefer the tinted size which is off a yellow ochre colour, this enables the gilder to see where they have painted the size and also if any small parts have been missed when gilding, this will not show as it will blend in, being close in colour. Most preferably when gilding on stone most gilders use the Lymmit 1 hour tinted gold size. This is brushed onto the lettering thinly and once tacky like the dry tack on a post it note it is then ready to apply the Gold Leaf. The drying time for the size and enamel may vary depending on the temperature of where you are working. It will be anything from approximately 30 minutes to 2 hours. Most Monumental Masons use Loose Gold Leaf when gilding on stone and there are several ways to apply the leaf, everybody having their own technique that works for them. The leaf is usually rolled from the booklet onto the prepared lettering and then brushed over with a Gilders Mop to brush away any excess leaf. If the lettering is not too small and deep Transfer Leaf can be used which when working outside can be easier for you as it eliminates the risk of the leaf blowing away. The Transfer Leaf is adhered to a piece of acid free tissue paper and this is placed Gold faced down onto the prepared lettering and then with a rubber eraser or a soft cloth, gently rub the back of the tissue paper and this will allow the leaf to be released from the tissue paper. Again, gently brush over the gold leaf with a Gilders Mop to brush away any excess leaf. Once the gilding has all been completed this should be left to allow the size/paint to dry hard. Once it is completely dry you can then use a sharp blade to scrape away the excess size/paint and undercoat. Wash away all residue with clean water. To pick out colour on headstones, Monumental Masons use Wright-it Gloss Enamel Paints or One Shot Gloss Enamel Paints, these are available in a large range of colours, in 118ml, 236ml and 250ml tins. TOOLS USED IN GILDING ON STONE Transparent Sealer - Series 3886, Available in 250ml Wright-it Gloss Enamel Paints - Series 6263- **, Available in a wide range of colours in 250ml tins One Shot Gloss Enamel Paints - Series 6280-**, Available in a wide range of colours in 118ml & 236ml tins Lymmit Gold Size - Series 3890 & 3891, Available in 1 hour and 4 hour drying times and in Clear or Tinted, 250ml tins Ox Hair FillingIn Brushes - Series 1392, available in 12mm, 18mm, 25mm, 37mm, 50mm, 75mm and 100mm Squirrel Hair Gilders Mops - Series 1420 & 1422, available in Sizes 2,4,6,8 and 10 Gold Leaf Loose & Transfer - Available in carats from 24ct down to 6ct, Palladium Leaf, Genuine Silver Leaf, Imitation Gold & Silver Leaf, Copper Leaf.

GLASS GILDING

There are many ways to glass gild from signage work for solicitors or public house through to Eglomise but covered in this particular fact sheet is gilding on glass for signage work. 1. Sketch of lettering or design prepared on thin paper. Outline traced in Brunswick Black to be seen on reserve side. Fasten to outside window taking care not to tear. 2. Prepare size - 4 capsules to 500ml warm clean water. Cleanliness is essential. 3. Clean glass thoroughly. 4. Shake a few leaves of gold onto a cushion, bring one leaf on to the centre of the cushion and blow flat. 5. Apply a liberal flow of size with a flat ox hair filling in brush to the glass ready to be gilded. 6. Start from the top left hand corner, lifting the gold leaf from the gilders cushion with a squirrel hair gilders tip and apply to glass. The Smiths Tip, stocked by Wrights of Lymm is ideal for this work as it has been made to fit and hold a full leaf of gold. 7. The leaf can be cut with a gilders knife is smaller pieces are required. Care should be taken that over laps and joints are made between letters. Allow the work to dry before proceeding. Examine closely and blot any tears of size which have not died. 8. With a fair sized wad of best cotton wool rub very lightly over gold to burnish it. You will now notice imperfections in the work, and to obtain best results "double gilding" is recommended. Another coat of size is applied and another layer of gold. This can be dried with clean blotting paper. When dry again rub with cotton wool gently. 9. Examine from the front. If not as bright as desired, get water just off the boil and wash down with the flat ox hair filling in brush. Dry quickly by blotting or dabbing with clean wash leather, formed into a smooth pad. Re-burnish with cotton wool. 10. Wash down once more with size, dry quickly and re-burnish. 11. Carefully remove drawing from front glass and prick round letters to form a pounce. Place on inner side, registering carefully with the position from outer glass. Pounce lettering onto gold. Write in letter or outline whichever is to appear in gold with Cover-it Matt Black Enamel and leave 12 hours to dry. The gold which is to remain is now fixed with this enamel. 12. To clean off the surplus gold use a wad of cotton wool dipped in whiting and water, do this as quickly as possible so that damp does not penetrate to gold. Trim all straight lines with chisel and straight edge. 13. Clean off front glass, carefully looking for any gold leaf. Write in completely covering letters with varnish colour, keeping an even distance from gold all round. When dry back up with clear varnish again going over edge of letter. 14. If window is to be backed with colour, mix with varnish, not turpentine. TOOLS USED IN WATER GILDING Gelatine Capsules - Series 1601 & 1602, available in packs of 10 or 100 Ox Hair FillingIn Brushes - Series 1392, available in 12mm, 18mm, 25mm, 37mm, 50mm, 75mm and 100mm Gilders Cushions - Series 3844 & 3844E - Available with Parchment Shield or Card Shield Gilders Knife - Series 3834 & 3832 - Available in Stainless Steel and Carbon Steel Smiths Tip - Series 1443 - Ideal for Glass Gilding Squirrel Hair Gilders Tips - Series 1441 & 1442, available in Short, Medium and Long Squirrel Hair Gilders Mops - Series 1420 & 1422, available in Sizes 2,4,6,8 and 10 Brunswick Black - Series 6000, available in 250ml, 500ml, 1 Litre, 2.5 Litre Cover-it Matt Black Enamel - Series 6261-01, available in 250ml High Build Clear Gloss Varnish - Series 6295-09, available in 250ml, 1 Litre, 5 Litre Gold Leaf Loose & Transfer - Available in carats from 24ct down to 6ct, Palladium Leaf, Genuine Silver Leaf, Imitation Gold & Silver Leaf, Copper Leaf. ALL PRODUCTS MENTIONED CAN BE PURCHASED FROM OURSELVES, PLEASE VISIT OUR WEBSITE - www.wrightsoflymm.co.uk For further help and information on Glass Gilding the following publications cover this in great depth and can be purchased from ourselves - Gold Leaf Paint & Glass by Frances Federer Gold Leaf Techniques by Kent H Smith

OIL GILDING

Oil Gilding is the process of using Oil-based size (glue) to adhere Gold Leaf, be it Loose or Transfer (Patent) to a particular surface or substrate, and is the only choice if gilding externally or damp conditions. There are several types of oil size, ranging from quick drying sizes which are 1 hour or less in drying time (ie the time ready to apply the Gold Leaf) to slow drying sizes of 12 hours or more, and of course in oil gilding it is possible to use not just gold leaf of which there are carats from 24ct down to 6ct, but also a wide selection of other metals including Platinum, Silver, Copper and Aluminium at the gilders disposal. After you have prepared the surface (see separate fact sheet on surface preparation) the next stage would be to apply the size. Gold size should be applied as thinly as possible with a good flat ox hair filling in brush (series 1392) This is an ideal brush for flat, moulding work with large wide bands, where you can define the edges with masking tape. Whilst if you are doing lots of carved narrow mouldings, round brushes made of a good hog hair is more beneficially. As mentioned above gold size is put on thinly and sparingly making sure all surfaces are evenly coated and there are no puddles or pools of size left, especially in carved or moulded areas. If this happens the gold leaf being 1-250,000 of an inch thin will drop into the pools and loose all of its lustre. TESTING SIZE FOR THE CORRECT TACK Because there are so many variables in this process, ie. drying time of size, thickness that the gilder applies the size and temperature and humidity conditions, this procedure of testing has to be visited by the gilder on a number of occasions. The ideal tack that the gilder is looking for before applying gold leaf is that of the dry tack of a post it note. Some people prefer to use the back of their knuckle or indeed the slight pull of the hairs on the back of one's hands will also work. However this is achieved, the thing always to remember is that the gold leaf has got to sit on the very top of the size in that area just before the product totally cures. The surface of the fresh size has a wet shine which when ready becomes just a little duller. The window on most oil size ie. the time you can apply gold leaf before the size dries completely, is usually hours long. To avoid dust settling on the surface of the size, if it is possible to stand the object vertically or indeed cover the work with a paper tent, reduces the risk of dust contamination. GILDING WITH LOOSE GOLD LEAF Loose Gold Leaf can be cut and applied to the work in a number of ways, most craftsmen develop their own specific ways of removing the gold from the booklet to the substrate that they are working on. Some Gilders and Signwriters seldom use a cushion and often use fingernails to cut the gold while the book of gold leaf is on one hand and a gilders tip in the other. However the traditional method used by most gilders that would work in a studio has not changed for hundreds of years. The gold is transferred from the book to a gilders cushion where with a accurate soft blow of air from the gilders mouth, flattens the gold to the cushion and allows it to be cut by a gilders knife into pieces, then a gilders tip (that is lightly brushed across the bridge of the nose to pick up the faintest trace of grease) is placed onto the gold and the gold is then able to be lifted to the work. This process is repeated until the piece is fully covered in gold leaf. Once that is achieved a gilders mop made out of squirrel hair can be used to tidy up the work and brush all the excess gold (scewings) off the work. These can be kept and reused or alternatively sold back to the Gold Leaf Manufacturer for recycling. Depending on the skill of the Gilder there may be places when gilding where the gold has not taken, this is called "faulting". When gilding over a coloured surface, faults will be easy to see but if you have used a tinted size which will be yellow in colour this may be harder to notice. Cut a leaf of loose gold leaf into small pieces to apply to the places that have been missed. If the size is almost dry, breath gently over the size and this should bring back some of the tackiness and allow the leaf to stick. If faults are found once the gold size has completely dried, a small amount of size will need to be re-applied, and preferably a clear size. It is not always easy to judge the amount you can gild at one time or you may get called away from your work to which the gold size then becomes completely dry. If you then apply a second coat of gold size, once gilded this will look slightly different to work already done. You are therefore better to remove the dried size and start from scratch with just one coat. To remove the dried size, gently wipe over with white spirit being careful not to go over the already gilded surface. Before re-applying a new coat of size, the surface should be clean, dry and free from any dust. GILDING WITH TRANSFER GOLD LEAF Transfer Leaf is where the gold leaf is adhered to a piece of acid free tissue paper which acts as a carrier, therefore a gilders cushion, knife and tip are not required in the application of the leaf. Transfer Leaf is ideal for flat surfaces, but if the surface you are gilding is very intricate then loose leaf would be required. If you need to cut the transfer leaf into smaller pieces, this can be done with very sharp, clean scissors or blade. To apply the transfer leaf, hold the tissue on the border around the leaf and place gold face down onto the sized area. Gently rub the back of the tissue paper either with your fingers or a soft cloth, rubbing away from the border you are holding and then slowly pull the tissue paper away. When applying the second sheet of transfer leaf, you will need to overlap the leaf already down by approximately 3mm and keep repeating this process. Once you have finished gilding the surface you will need to look over you work for any faulting (as mentioned above in Gilding with Loose Gold Leaf Section). TOOLS USED IN OIL GILDING Oil-Based Gold Size - Lymmit Gold Size / Japan Gold Size / Le Franc Gold Size / One Shot Gold Size Filling In Brushes - Series 1392, available in 12mm, 18mm, 25mm, 37mm, 50mm, 75mm and 100mm Gilders Cushions - Series 3844 & 3844E - Available with Parchment Shield or Card Shield Gilders Knife - Series 3834 & 3832 - Available in Stainless Steel and Carbon Steel Squirrel Hair Gilders Tips - Series 1441 & 1442, available in Short, Medium and Long Squirrel Hair Gilders Mops - Series 1420 & 1422, available in Sizes 2,4,6,8 and 10 Gold Leaf Loose & Transfer - Available in carats from 24ct down to 6ct, Palladium Leaf, Genuine Silver Leaf, Imitation Gold & Silver Leaf, Copper Leaf. ALL PRODUCTS MENTIONED CAN BE PURCHASED FROM OURSELVES, PLEASE VISIT OUR WEBSITE - www.wrightsoflymm.co.uk For further help and information on Oil Gilding the following publications cover this in great depth and can be purchased from ourselves - Practical Gilding by Peter & Ann Mactaggart Gold Leaf Techniques by Kent H Smith

A GUIDE TO APPLYING IMITATION GOLD/SILVER LEAF & COPPER LEAF

Imitation Leaf and Copper Leaf are thicker than Genuine God Leaf but still need to be handled with care as the leaf can tear or become creased very easily. Prior to gilding you will need to ensure the that surface is clean, dry and dust free. When you have prepared the surface, apply a thin coat of the Acrylic Gold Size using the Ox Hair Filling In Brush. The Ox hair is soft to eliminate the brush marks. Allow to dry for 15-30 minutes until the size becomes tacky like that of the glue on a post it note. Once the Acrylic Size has reached that tack you will then be ready to apply the leaf. If you are gilding with the loose leaf, if very careful you can take the leaf from the booklet with your fingers and lay onto the surface, however you may find it easier to use a Badger Hair Gilders Tip. The hair of the tip is gently brushed against the side of you face to build up some static or grease to attract the leaf to the tip from the booklets and then used as the carrier to the surface you are gilding. If you are gilding with the transfer leaf, this is adhered to a piece of wax paper which is used as the carrier. Place the leaf face down on to the dry tack acrylic gold size and gently rub the back of the waxed paper to release the leaf onto the surface and then pull the wax paper away. As Imitation Leaf and Copper Leaf are thicker than Genuine Gold Leaf, both the loose and the transfer leaf can be cut to smaller pieces with chalked sharp scissors. Once the gilding process has finished use the gilders mops to gently brush over the leaf, this will brush away any excess leaf and also flatten the leaf into place. The mop is made of pony hair which is soft enough to not cause any scratching on the leaf. Once the leaf is in place it is then ready for you to apply the Shellac Varnish, again using the Ox Hair Filling In brush to eliminate brush marks. Imitation Gold and Copper Leaf will both tarnish so it is important to apply a varnish over the top of these to prevent the tarnishing process, however the Imitation Silver Leaf is made from Aluminium and will not tarnish and so it is not always necessary to apply the varnish. Imitation Gold and Copper Leaf are for interior use only. Imitation Silver Leaf can be used both interior and exterior, however if using externally you will need to use an oil based size not the acrylic size included in the kit. The gilding process will be the same but the oil based size will take 1 - 3 hours to become tacky instead of 15-30 minutes and an exterior varnish will need to be applied. This is just a guide to gilding with Imitation Gold/Silver Leaf and Copper Leaf, for a more extensive guide we supply a book called "Practical Gilding Manual" which is a very informative book for all aspects of gilding.

Can I paint over gold leaf?

Yes with Genuine gold leaf you can paint over gold leaf with acrylic paint, however if you are using imitation gold leaf , then the imitation Gold Leaf must first be sealed before it can be painted over with acrylic paint or any other acrylic products.

Does Gold Leaf need to be sealed?

Genuine Gold Leaf does not tarnish, so it will not need to be sealed , however imitation gold leaf will need to be sealed as over time it will tarnish.

How Long does gold leaf last?

If gilded correctly 23ct or above Gold Leaf can last for between 20 – 30 years external unsealed. It is recommended that gold leaf that is 23ct or above is not sealed as most sealers tend to break down over a period of time and typically only last for around 3-5 years.

What is Imitation Gold Leaf Made from?

Imitation gold leaf is normally made from a variety of different metals including Brass or Dutch and Zinc.

How do you clean gold leaf?

Gold Leaf can be cleaned using a very soft gilding mop or soft cloth to gently wipe the gold leaf itself. It is important that you do not rub the gold leaf as this can potentially damage it slightly.

What do you use to apply Gold Leaf?

There are a number of different tools that can be used to apply gold leaf depending on your preference. We have a range of gilders tips that can be used to apply the gold leaf, we also stock a range of brushes that can be used to apply gold leaf to a surface. Both items can be found in the gilding section of our website.

What products would I need to start gilding?

If you are new to gilding and have no prior experience or knowledge with gilding we offer a wide range of starter kits for Gold Leaf , Silver Leaf , Imitation Gold leaf , imitation Silver leaf and Copper Leaf. Which contain all of the products that you will need in order to get started with gilding. Including Leaf , Gold Size , Gold Leaf Brushes , Gold Leaf tips , Gilders cushions , Gilders knives and Gilding manuals. All of the Gilding Starter kits are available in the gilding section of our website.

What is Gold Size?

Gold size is a form of glue that can be used as an adhesive in order to make sure that the gold leaf adheres correctly to the surface that is to be gilded. We offer a range of different gold sizes that typically fit into two different categories. Water-based size and Oil- based size. Water based size is only suitable for interior work and shouldn’t be used for exterior work. Oil- based size is recommended to be used on exterior work.